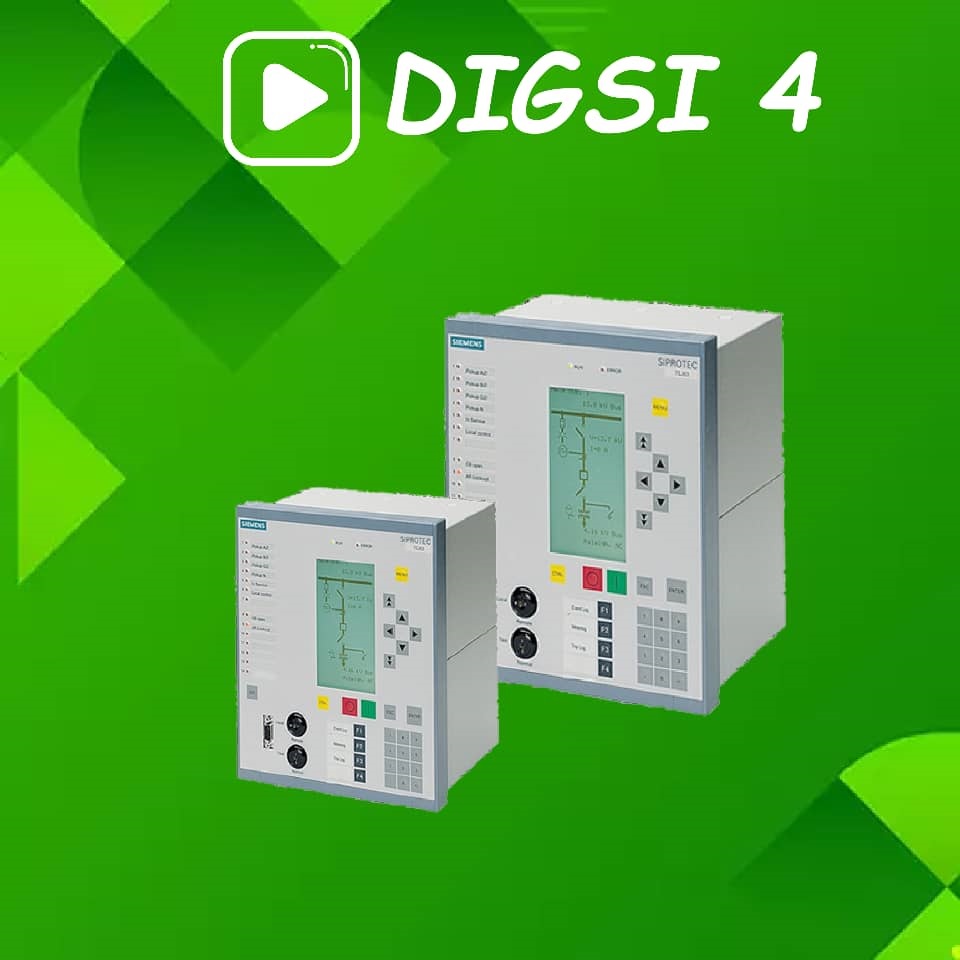
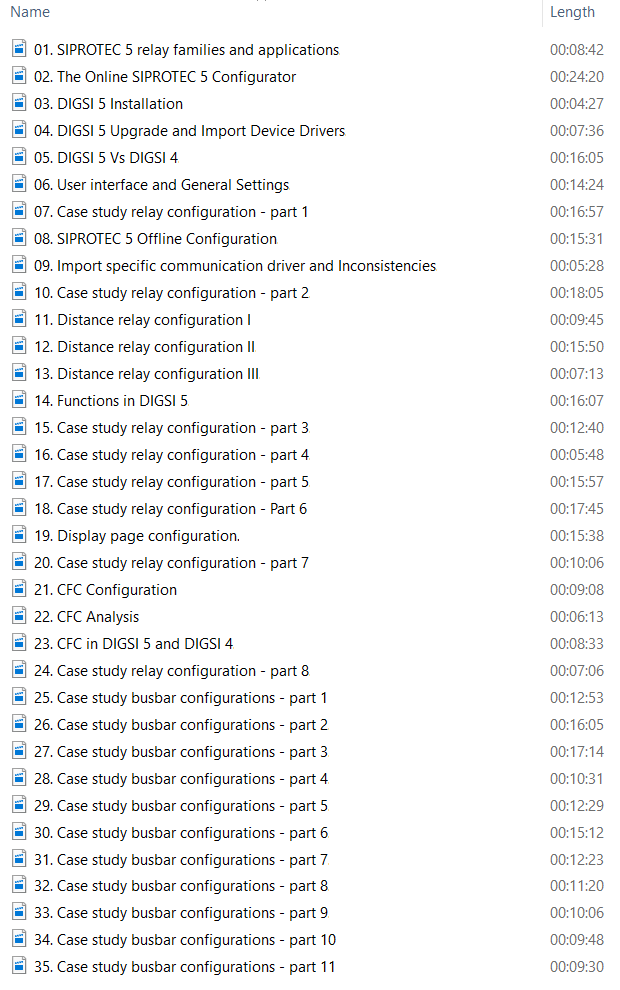
The possibilities of interactive training with video are endless. Such training can be accessed whenever and wherever it is needed, as often as is necessary. It is highly cost-effective, reduces travel, and time-saving. We provide professional video training package on SIPROTEC and DIGSI

  • High-Quality Video (Full HD – 1080p)
  • Free lifetime technical support with quick response (WhatsApp, E-mail, Telegram, and Remote technical support if needed
  • Share the valuable experiences in the field as a user, not as a promoter
  • Short videos in English with easy-to-digest content
  • Share the most up to date experiences, news, and documents relevant to each course
  • Training by a reputed instructor (Dr. Saeed Roostaee)

Video Training on DIGSI 4 & DIGSI 5 (10 Hours)


Download:

Click here to download full package including DIGSI 4, DIGSI 5, and IEC 61850 training packages

Click here to download full package including DIGSI 4, DIGSI 5, and IEC 61850 training packages

DIGSI 4 training will be taking you through the key stages of working with DIGSI 4 by using practical examples. This online course is suitable for electrical engineers with a desire to understand the fundamentals of configuring SIPROTECT 4 with DIGSI 4.

DIGSI 4 Online Training

Covered Items

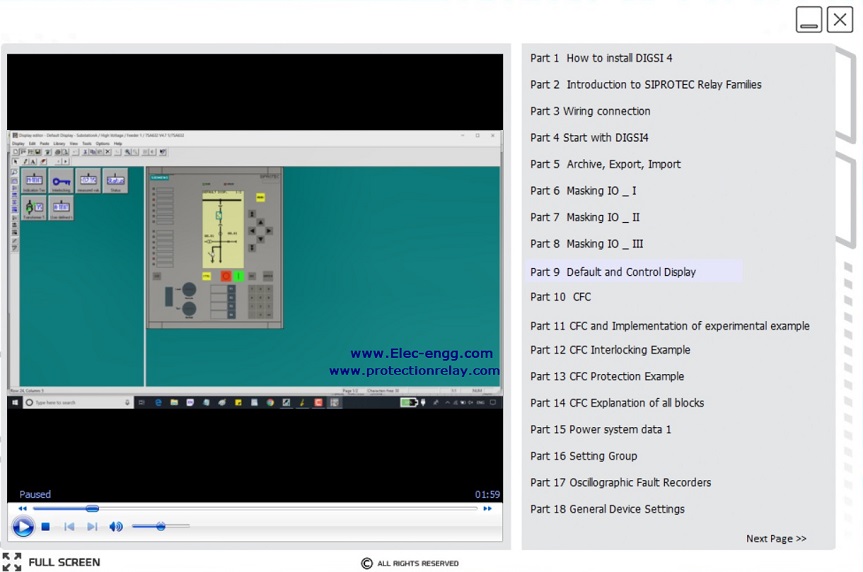
Demo Video

What you learn:

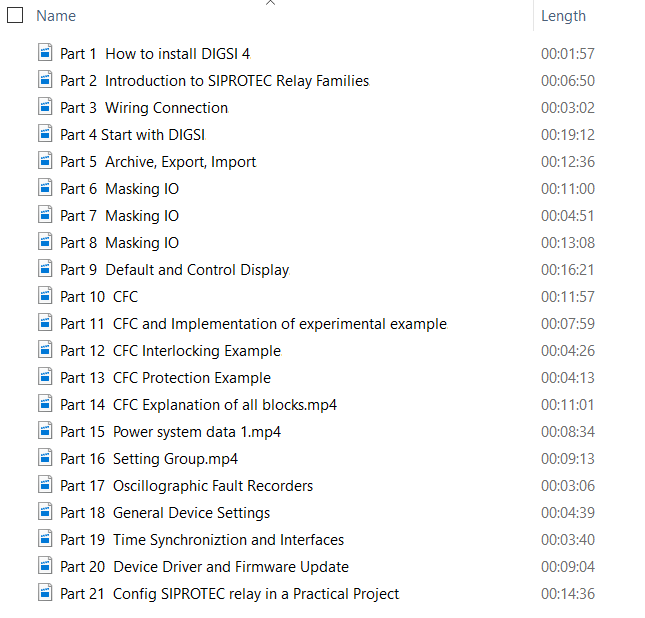
Part 1 (01:57): How to install DIGSI 4

Part 2 (06:50): Introduction to SIPROTEC Relay Families

Part 3 (03:02): Wiring Connection

Part 4 (19:12): Start with DIGSI

Part 5 (12:36): Archive, Export, Import

Part 6 (11:00): Masking I/O

Part 7 (04:51): Masking I/O

Part 8 (13:08): Masking I/O

Part 9 (16:21): Default and Control Display

Part 10 (11:57): CFC

Part 11 (07:59): CFC and Implementation of experimental example

Part 12 (04:26): CFC Interlocking Example

Part 13 (04:13): CFC Protection Example

Part 14 (11:01): CFC Explanation of all blocks

Part 15 (08:34): Power system data 1

Part 16 (19:13): Setting Group

Part 17 (03:06): Oscillographic Fault Recorders

Part 18 (04:39): General Device Settings

Part 19 (03:40): Time Synchronization and Interfaces

Part 20 (09:04): Device Driver and Firmware Update

Part 21 (14:36): Config SIPROTEC relay in a Practical Project

Free Updates:

Updated on Dec 20, 2021: SIPROTEC 7UT6 config & setting description, and how to test differential function in SIPROTEC 7UT6

Certificate of completion for our enrolled members:

  1. A 1000: Click here to download
  2. A 1001: Click here to download
  3. A 1002: Click here to download
  4. A 1003: Click here to download
  5. A 1004: Click here to download
  6. A 1005: Click here to download
  7. A 1006: Click here to download
  8. A 1007: Click here to download
  9. A 1008: Click here to download
  10. A 1009: Click here to download
  11. A 1010: Click here to download
  12. A 1011: Click here to download
  13. A 1012: Click here to download
  14. A 1013: Click here to download
  15. A 1014: Click here to download
  16. A 1015: Click here to download
  17. A 1016: Click here to download
  18. A 1017: Click here to download
  19. A 1018: Click here to download
  20. A 1019: Click here to download
  21. A 1020: Click here to download
  22. A 1021: Click here to download
  23. A 1022: Click here to download
  24. A 1023: Click here to download
  25. A 1024: Click here to download
  26. A 1025: Click here to download
  27. A 1026: Click here to download
  28. A 1027: Click here to download
  29. A 1028: Click here to download
  30. A 1029: Click here to download
  31. A 1030: Click here to download
  32. A 1031: Click here to download
  33. A 1032: Click here to download
  34. A 1033: Click here to download
  35. A 1034: Click here to download
  36. A 1035: Click here to download
  37. A 1036: Click here to download
  38. A 1037: Click here to download
  39. A 1038: Click here to download
  40. A 1039: Click here to download
  41. A 1040: Click here to download
  42. A 1041: Click here to download
  43. A 1042: Click here to download
  44. A 1043: Click here to download
  45. A 1044: Click here to download
  46. A 1045: Click here to download
  47. A 1046: Click here to download
  48. A 1047: Click here to download
  49. A 1048: Click here to download
  50. A 1049: Click here to download
  51. A 1050: Click here to download
  52. A 1051: Click here to download
  53. A 1052: Click here to download
  54. A 1053: Click here to download
  55. A 1054: Click here to download
  56. A 1055: Click here to download
  57. A 1056: Click here to download
  58. A 1057: Click here to download
  59. A 1058: Click here to download
  60. A 1059: Click here to download
  61. A 1060: Click here to download
  62. A 1061: Click here to download
  63. A 1062: Click here to download
  64. A 1063: Click here to download
  65. A 1064: Click here to download
  66. A 1065: Click here to download
  67. A 1066: Click here to download
  68. A 1067: Click here to download
  69. A 1068: Click here to download
  70. A 1069: Click here to download
  71. A 1070: Click here to download
  72. A 1071: Click here to download
  73. A 1072: Click here to download
  74. A 1073: Click here to download
  75. A 1074: Click here to download
  76. A 1075: Click here to download
  77. A 1076: Click here to download
  78. A 1077: Click here to download
  79. A 1078: Click here to download
  80. A 1079: Click here to download
  81. A 1080: Click here to download
  82. A 1081: Click here to download
  83. A 1082: Click here to download
  84. A 1083: Click here to download
  85. A 1084: Click here to download
  86. A 1085: Click here to download
  87. A 1086: Click here to download
  88. A 1087: Click here to download
  89. A 1088: Click here to download
  90. A 1089: Click here to download
  91. A 1090: Click here to download
  92. A 1091: Click here to download
  93. A 1092: Click here to download
  94. A 1093: Click here to download
  95. A 1094: Click here to download
  96. A 1095: Click here to download
  97. A 1096: Click here to download
  98. A 1097: Click here to download
  99. A 1098: Click here to download
  100. A 1099: Click here to download
  101. A 1100: Click here to download
  102. A 1101: Click here to download
  103. A 1102: Click here to download
  104. A 1103: Click here to download
  105. A 1104: Click here to download
  106. A 1105: Click here to download
  107. A 1106: Click here to download
  108. A 1107: Click here to download
  109. A 1108: Click here to download
  110. A 1109: Click here to download
  111. A 1110: Click here to download
  112. A 1111: Click here to download
  113. A 1112: Click here to download
  114. A 1113: Click here to download
  115. A 1114: Click here to download
  116. A 1115: Click here to download
  117. A 1116: Click here to download
  118. A 1117: Click here to download
  119. A 1118: Click here to download
  120. A 1119: Click here to download
  121. A 1120: Click here to download
  122. A 1121: Click here to download
  123. A 1122: Click here to download
  124. A 1123: Click here to download
  125. A 1124: Click here to download
  126. A 1125: Click here to download
  127. A 1126: Click here to download
  128. A 1127: Click here to download
  129. A 1128: Click here to download
  130. A 1129: Click here to download
  131. A 1130: Click here to download
  132. A 1131: Click here to download
  133. A 1132: Click here to download
  134. A 1133: Click here to download
  135. A 1134: Click here to download
  136. A 1135: Click here to download
  137. A 1136: Click here to download
  138. A 1137: Click here to download
  139. A 1138: Click here to download
  140. A 1139: Click here to download
  141. A 1140: Click here to download
  142. A 1141: Click here to download
  143. A 1142: Click here to download
  144. A 1143: Click here to download
  145. A 1144: Click here to download
  146. A-1145:Click here to download
  147. A-1146:Click here to download
  148. A-1147:Click here to download
  149. A-1148:Click here to download
  150. A-1149:Click here to download
  151. A-1150:Click here to download
  152. A-1151:Click here to download
  153. A-1152:Click here to download
  154. A-1153:Click here to download
  155. A-1154: Click here to download
  156. A-1155: Click here to download
  157. A-1156: Click here to download
  158. A-1157: Click here to download
  159. A-1158: Click here to download
  160. A-1159: Click here to download
  161. A-1160:Click here to download
  162. A-1161:Click here to download
  163. A-1162:Click here to download
  164. A-1163:Click here to download
  165. A-1164:Click here to download
  166. A-1165:Click here to download
  167. A-1166:Click here to download
  168. A-1167:Click here to download
  169. A-1168:Click here to download
  170. A-1169:Click here to download
  171. A-1170:Click here to download
  172. A-1171:Click here to download
  173. A-1172:Click here to download
  174. A-1173:Click here to download
  175. A-1174:Click here to download
  176. A-1175:Click here to download
  177. A-1176:Click here to download
  178. A-1177:Click here to download
  179. A-1178:Click here to download
  180. A-1179:Click here to download
  181. A-1180:Click here to download
  182. A-1181:Click here to download
  183. A-1182:Click here to download
  184. A-1183:Click here to download
  185. A-1184: Click here to download
  186. A-1185: Click here to download
  187. A-1186: Click here to download
  188. A-1187: Click here to download
  189. A-1188: Click here to download
  190. A-1189: Click here to download
  191. A-1190: Click here to download
  192. A-1191: Click here to download
  193. A-1192: Click here to download
  194. A-1193: Click here to download
  195. A-1194: Click here to download
  196. A-1195: Click here to download
  197. A-1196: Click here to download
  198. A-1197: Click here to download
  199. A-1198: Click here to download
  200. A-1199: Click here to download
  201. A-1200:Click here to download
  202. A-1201:Click here to download
  203. A-1202:Click here to download
  204. A-1203:Click here to download
  205. A-1204:Click here to download
  206. A-1205:Click here to download
  207. A-1206:Click here to download
  208. A-1207:Click here to download
  209. A-1208:Click here to download
  210. A-1209:Click here to download
  211. A-1210: Click here to download

Other Courses:

  • Installing DIGSI 4
  • Managing Projects
  • Working with the Devices
  • Optimizing Parameterization

Sample page of the file:

The first step is to create a new project. The DIGSI Manager has been started, a project dialog box has not yet been opened.

Click File- New of the menu bar, enter a new project name and confirm with OK.

The project dialog box is displayed.

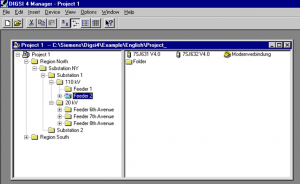
Names and symbols of all project containers are displayed in a hierarchical tree structure. To put it less complicated, we could say that containers are displayed. This pane is called a tree view. An opened folder is the first symbol to be displayed in this pane. The opened folder is designated as project 1 and represents the top level, the project itself.

The right pane of the window shows a folder-type object. If the DIGSI 4 Remote program is installed, a phone book type object and modem type object each are displayed in addition. Otherwise, this pane of the window continues to remain empty. This page serves to display further names of symbols of objects, which are contained in one of the selected containers of the tree view. To put it less complicated, we could say that this pane shows objects. Since the right pane of the window is represented as a list, this structure is called a list view.

Up to four objects are first automatically created within a new project of the tree view.
Project (cannot be inserted manually)
Folder (to structure a project)
Phone Book (station addresses for a modem connection)
Modem (for the communication  SIPROTEC between your computer and the SIPROTEC 4 device
modem connection for the storage of modem profiles).
Phone Book and modem will be created automatically if the DIGSI 4 Remote component has been loaded.

The SIPROTEC 4 device object type represents a real SIPROTEC 4 device with all its setting values and process data.

The V3/V2 device object type serves to create shortcuts linked to the V3/V2 devices within the project structure. These device data are processed with DIGSI-V3.x.

The SIPOROTEC 4 version object type is created to document different parameter settings groups of a SIPROTEC 4 device. The device address (VD number) of the corresponding versions is identical to that of the original device.

The left window pane contains the names and symbols of all project containers in a hierarchical tree structure.
The right window pane displays the objects of the selected folders. The structure is designated as a list view.

Your first step to creating a system-specific project structure is to insert folder-type blank containers in the corresponding levels.

Click a folder object to insert a subordinate folder via the menu command ® Paste. A maximum of 9 levels is the permissible hierarchy depth.

Several objects can be juxtaposed in parallel.

The names of the folders can be renamed to easily adjust to the requirements of your operation.

As a first step, you create a new project. The DIGSI 4 Manager is started, no project window is open.

  • Click File ® New in the menu bar.
  • In the New dialog box, enter Project 1 as a name for the new project.
    Don‘t modify any other settings.
  • Click OK.
    The project window is now displayed in the working range. Put it to full size.
  • An object of the type Hierarchical level is inserted automatically upon creating a new project.
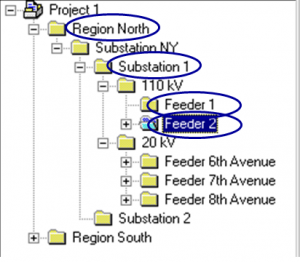
  • Click this object and then click the selected name. Enter Region Nord as a new name.
  • Right-click an existing hierarchical level and insert the lower-level hierarchical level via the context menu Insert new object ® Hierarchical level. Enter the new name.
  • Click a hierarchical level, e.g. Feeder 1, and open the device catalog via the context menu.
  • Select the device and draw it on the hierarchical level.

The Device Catalog shows all SIPROTEC 4 devices available (installed) in the DIGSI 4 Manager.
The device catalog is an independent item. When you open the catalog, a button is created in the taskbar by Windows. The device catalog can remain open while working with the DIGSI 4 Manager to install all required SIPROTEC 4 devices.

Select a folder type object and click View ® Device Catalog to open the Device Catalog window.

The device catalog has a structure. Clicking a plus sign or double-clicking a folder icon will open the subordinate level.

For example, if you double-click 7SJ (time overcurrent protection), all installed SIPROTEC 4 devices with the device type names and the variant numbers will be displayed.

Short technical information is displayed on the lower catalog border for each device selected.

Note: Devices cannot be placed directly underneath the project folder!

The MLFB tab serves to determine the order number of the selected SIPROTEC 4 device in DIGSI 4. The order number is the code for the type and variant of the SIPROTEC 4 device. The order number is called the MLFB number.
Order number determination in DIGSI 4 affects all further parameterization options. Identical MLFB numbers are necessary for the communication between the DIGSI 4 device operation and the connected SIPROTEC 4 device. This is checked when setting up the connection.

The MLFB tab contains several drop-down list boxes. The drop-down list boxes related to the selected SIPROTEC 4 device are activated, only. These drop-down list boxes serve to select the order numbers to define the SIPROTEC 4 design and type in DIGSI 4.

As a first step, create a new project. The DIGSI 4 Manager is started, no project window is open.

Click File ® New in the menu bar.

  • In the New dialog box, enter Project 1 as a new project name.
    Don‘t change any other settings.
  • Click OK.
    The project window is now displayed in the working range. Put it to full size.

When creating a new project, an object of the type Hierarchical level is inserted automatically.

  • Click this object and then click the selected name. Enter Region North as a new name.
  • Right-click on an existing hierarchical level and insert a lower hierarchical level vie the context menu Insert new object ® Hierarchical level. Enter the new name.
  • Click a hierarchical level, e.g. Feeder 1, and open the device catalog via the context menu.
  • Select the device and draw it on the hierarchical level.
  • As a first step, create a new project. The DIGSI 4 Manager is started, no project window is open. Click File ® New in the menu bar.
    • In the New dialog box, enter Project 1 as a new project name.
      Don‘t change any other settings.
    • Click OK.
      The project window is now displayed in the working range. Put it to full size.

    When creating a new project, an object of the type Hierarchical level is inserted automatically.

    • Click this object and then click the selected name. Enter Region North as a new name.
    • Right-click on an existing hierarchical level and insert a lower hierarchical level vie the context menu Insert new object ® Hierarchical level. Enter the new name.
    • Click a hierarchical level, e.g. Feeder 1, and open the device catalog via the context menu.
    • Select the device and draw it on the hierarchical level.

Properties like object name, comment, or date of creation, have been assigned to all objects (General tab).
Some properties only refer to certain objects, for ex. the MLFB number for the SIPROTEC 4 devices or the device communication settings.
The values of the majority of the properties can be changed.

Select the object and click the View ® Details menu item to display the object properties. You can also open the Object Properties dialog box via the context menu or via the menu item Edit ® Object Properties

If the property values are grayed, they cannot be changed. Depending on the entries you made in other text boxes, such text boxes may be activated. Property values in white/empty text boxes can be edited.

DIGSI 4 training pack
About:

This course is a combination of lectures, software packages, tutorial videos of the experiences in the lab. Become familiar with the DIGSI 4 software for configuring and setting SIPROTEC  4 relays with Windows-based MATRIX-driven software.
Learn also how to analyze grid fault events based on the data stored in the relay.

The training is intended for protective relay engineers, designers, and technicians from electric utilities and the industrial section interested in the programming, commissioning, maintenance, and operating of SIPROTEC4 protection devices.

DIGSI 4 and DIGSI 5 Online Training

DIGSI 4 Online Training Course

DIGSI 5 Online Training Course

Place of training:

This course will be held in your place.

Instructors:

  • Dr. Saeed Roostaee

More information Please Contact Us

Related product:

DIGSI 4 Training Pack